|
|
 |
|
 |
||
|
|
Insights & news
|
|
|
|
|
||
|
|

.
|
|
|
|
|
|
We all know that there are many internet browsers available, but definitely Google Chrome is one of the most used nowadays and therefore we have had a lot of feedback from our customers related to using chrome with SAP BusinessObjects.
A main problem found by users is that when using Google Chrome on InfoView or BiLaunchPad a missing plug-in error screen appears when you are trying to modify a report and it also shows a HTTP Status 500 error screen when trying to log in to SAP BusinessObjects Explorer. In this blog I will provide a solution these issues.
The solution we have found is to use a Google Chrome add-on called “IE tab”, which emulates Internet Explorer on Chrome.
Steps to install it:
Moreover, in case you need to click on an Open Document link and you want Google Chrome to be opened up automatically with it you will need to add your server’s url so it can open successfully, for this you need to follow these steps:
The outcome
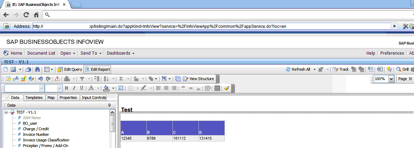
SAP BusinessObjects web based applications can be successfully used with Google Chrome, see below the following examples:
Summary
The main benefits of applying these tips are, with the help of Google Chrome:
According to the SAP’s official PAM (Product Availability Matrix), Google Chrome is not entirely supported due to its fast development speed, so the use and frequent update of this add on is highly recommended.
Hope this will help you have a better experience when working with SAP BusinessObjects. If any doubts or suggestions please leave a comment below.
Nowadays we have noticed some of our customers are following the trend of open source products. Indeed, Linux is a great choice of operating system due to the fact it is totally compatible with SAP BusinessObjects BI 4 and it also help companies to cut costs. However, Linux has retained the way the classical Unix operating system works and therefore everything is about rights and batch commands. Therefore an advanced Linux technical know-how is compulsory before getting into it.
The purpose of this blog entry is to share the issues we faced in one of our customers running SAP BusinessObjects BI4 SP4 in a Red Hat Enterprise Linux Server release 6.3 using MySQL 5.1.61 as the system database and how we solved them.
The issue came out when right after a production database migration (a brand new SQL Server 2008) all their WebI documents stopped running from the SAP BI4 Launchpad with an unusual error "Database Error .[ (IES 10901)" blocking every single WebI to run and the whole core business was jeopardized. Rich Client did not experience any problem in Windows. After the first analysis, we discovered that default SQL Server ODBC driver installation was only configured properly for 32bit connections in the Linux server whereas WebI requires 64bit ODBC driver connectivity for running in the SAP BI4 Launchpad.
When it came to this point we had to apply a couple of OSS notes. The first one was OSS 1607125 "How to configure SQL Server connectivity for WebI from a BI4.0 unix environment". Resolution is:
1. Open env.sh under <install directory>/sap_bobj/setup/
2. Search for the following line
LIBRARYPATH="$LIBDIR:$LIBDIR32:$WCSCOMPONENTDIR:$PLUGINDIST/auth/secEnterprise:${CRPEPATH64}:${CRPEPATH}:${MWHOME}:$PLUGINDIST/desktop/CrystalEnterprise.Report:${BOBJEDIR}enterprise_xi40/$SOFTWAREPATH32/ras:${BOBJEDIR}mysql/lib”
3. Modify the line above by adding the following
":${BOBJEDIR}enterprise_xi40/linux_x64/odbc/lib:${BOBJEDIR}enterprise_xi40/$SOFTWAREPATH32/odbc/lib"
The line should look like this
LIBRARYPATH="$LIBDIR:$LIBDIR32:$WCSCOMPONENTDIR:$PLUGINDIST/auth/secEnterprise:${CRPEPATH64}:${CRPEPATH}:${MWHOME}:$PLUGINDIST/desktop/CrystalEnterprise.Report:${BOBJEDIR}enterprise_xi40/$SOFTWAREPATH32/ras:${BOBJEDIR}mysql/lib:${BOBJEDIR}enterprise_xi40/linux_x64/odbc/lib:${BOBJEDIR}enterprise_xi40/$SOFTWAREPATH32/odbc/lib”
4. Navigate to <install directory>sap_bobjenterprise_Xi40
5. Open odbc.ini file using vi or other text editor tools.
6. Find the entry for Sql Server DSN. The default DSN entry in the odbc.ini is called "[SQL Server Native Wire Protocol]" but it's recommended that you create your own DSN entry using the same parameters specified in the default DSN.
7. Update the "Driver" section of the DSN to point to 64 bit version of SQL Server ODBC drivers
Driver=<install directory>/sap_bobj/enterprise_xi40/linux_x64/odbc/lib/CRsqls24.so
8. Restart the SIA
However the issue was not resolved completely. We received a new error with the following description whenever we tried to run a WebI "Receive the error : Database error: [DataDirect][ODBC lib] System information file not found. Please check the ODBCINI environment variable.. (IES 10901) (WIS 10901)". This is a configuration issue on the Linux operating system with the environment variable ODBCINI. Please make sure your environment variables are set correctly according to OSS note 1291142 - "Web Intelligence reporting using DataDirect drivers in Unix" (as of today it still applies to BI4). Resolution is:
1. In the Bobje user's Unix profile, add/modify the following environment variables and source the profile
BOBJEDIR=<install_path>/bobje export BOBJEDIR ODBC_HOME=$BOBJEDIR/enterprise120/<platform>/odbc export ODBC_HOME ODBCINI=$BOBJEDIR/odbc.ini export ODBCINI LD_LIBRARY_PATH=$BOBJEDIR/enterprise120/<platform>/dataAccess/RDBMS/connectionServer:$ ODBC_HOME/lib:$BOBJEDIR/enterprise120/<platform>/:$LD_LIBRARY_PATH export LD_LIBRARY_PATH
NOTE: For AIX replace LD_LIBRARY_PATH with LIBPATH, For HP-UX use SHLIB_PATH NOTE: Replace <platform> with linux_x86, solaris_sparc, aix_rs6000, hpux_pa-risc depending on your specific Linux platform. NOTE: You must set/export the above env variables in the same order as shown.
Please make sure to use the file $HOME/.odbc.ini as your default source for ODBC settings. Therefore, modify the ODBCINI variable in the following way:
ODBCINI=$HOME/.odbc.ini export ODBCINI
2. Modify the odbc.ini to add the DSN
[TestDSN] Driver=<install_path>/enterprise120/<platform>/odbc/lib/CRmsss23.so Description=DataDirect 5.3 SQLServer Wire Protocol Driver Address=<sql_server host or ip>, <port> Database=<db_name> QuotedId=Yes AnsiNPW=No
NOTE: Your DSN name (TestDSN) must be the same DSN name you used when creating the ODBC connection in Windows
3. DataDirect provides both NON-OEM drivers and OEM drivers
The drivers provided by BI4 are OEM drivers. Basically the WebI is dependent on the ConnectionServer. By default the ConnectionServer is set to use NON-OEM drivers. Thus, we edited the connection server to allow the use of the OEM branded DD driver. The steps are:
4. Stop all XI servers
Run ./stopservers, log out completely from your unix shell and log back in (to make sure new environment variables are setup), start all BI4 servers again.
After applying the OSS note we were able to retrieve data from SQL Server 2008 refreshing our WebI documents, however we noticed that CPU was reaching 100% every time we used a WebI in any way. Going through the log files we found errors such as "MS SQL Server 2008 |JobId:61340512 |EXIT SQLGetDiagRec with return code -1 (SQL_ERROR)" .
We took a look at the odbc.ini file and we found out that QWESD entry that was not initially there somehow appeared. As long as we were copying the information from an existing datasource we didn't need it all and we decided to remove the QEWSD=<random string> from the ini file.
Finally double check that <Parameter Name="Use DataDirect OEM Driver" Platform="Unix">Yes</Parameter> located at sqlsrv.sbo file in /opt/bi40/sap_bobj/enterprise_xi40/dataAccess/connectionServer/odbc is set to Yes.
We hope that our experience is a rapid problem solving approach for you. If you have any tips or suggestions to improve this article, please leave a comment below.
This post will guide you through the steps on how to successfully make the upgrade of your Tomcat from version 5 to 6 in BOXI 3.x to remove the risk produced by a security hole. The process was done in an environment with Windows Server, SAP BusinessObjects Enterprise XI 3.1 SP3 and Apache Tomcat 5.5. The new Apache Tomcat used was version 6.0.36.
Resolution and steps
All instructions below are using default paths for SAP BusinessObjects and Tomcat 6 installations on a Windows system where the files are put in to “C:Program Files”; you can change replace these folders with your own ones.
1) Download Tomcat 6.0.x service installer (Where the x is the version that you want).
2) This step is only needed if your SAP BusinessObjects installation does not have the Java JDK installed:
2a) Download the JDK 5.0 Update 22.
2b) Install the JDK 5.0 Update 22 package.
3) Run and install the Tomcat 6.0.x executable. The Welcome screen will appear. Click Next.
4) Click "I Agree" on the License Agreement screen.
5) Select the install type from drop down box & click Next.
6) Enter the destination folder where Tomcat 6 is to be installed. Click Next
7) Enter the user name & password for Administrator login & click Next.
8) Enter the below mentioned path that points to JRE supplied with BOE XI 3.1 (or the JDK in “C:Program FilesJavajdk1.5.0_22” that was installed in step 2). Click Install.
9) Uncheck the "Show Readme" check box. Click Finish.
10) Tomcat will now start. There will be a small icon in the system tray as shown below.
11) In case that your system is 64bit you can download the Tomcat 6.0.x 64 bit binaries. You need both the tomcat.exe and tomcat6.exe files.
11a) Stop Tomcat and then overwrite your tomcat.exe and tomcat6.exe files in the directory where you installed Tomcat to “C:Program FilesApache Software FoundationTomcat 6.0bin” after backing up the current files.
11b) Start Tomcat service again.
12) Right click on the icon & click Configure.
13) The Apache Tomcat Properties screen will appear. Click on Java tab.
14) Add the path "C:Program FilesBusiness Objectsjavasdklibtools.jar" in Java Classpath field after the existing entry separated by a semi-colon (;).
15) Add the value 1024 (the value depends on your RAM) in Minimum and Maximum memory pool field.
16) Add the following values in the Java Options field.
-Dbobj.enterprise.home=C:/Program Files/Business Objects/BusinessObjects Enterprise 12.0/ -Xrs -XX:MaxPermSize=512M -Dbusinessobjects.olap.bin= -Dbusinessobjects.olap.stylesheets=C:/Program Files/Business ObjectsOLAP Intelligence 12.0/stylesheets/ -Djava.awt.headless=true -Daf.configdir=C:/Program Files/Business Objects/Dashboard and Analytics 12.0
17) Click on Apply, OK and restart the Tomcat service.
18) Open the file config.tomcat6 in Notepad. It can be located in "C:Program FilesBusiness Objectsdeployment" folder.
19) Uncomment the variable "as_service_name".
20) Assign the following values to the respective variables:
21) The file should look something like this:
##
## Business Objects Configuration Utility
##
# as_dir: the installation directory of the application server
as_dir=C:Program FilesApache Software FoundationTomcat 6.0
# as_instance: the application server instance to deploy to (represents the name of a folder in the conf/Catalina directory)
as_instance=localhost
# as_service_name: on windows, the name of the tomcat service when tomcat is installed as a service
as_service_name=Tomcat6
# as_service_key: on windows, when tomcat is installed as a service, the name of the key where the java startup parameters are stored
# (there is generally no need to touch this)
as_service_key=HKLMSOFTWAREApache Software FoundationProcrun 2.0${as_service_name}ParametersJava
# as_service_key_value: name of the String value where the java startup parameters are stored, in the key pointed to by as_service_key
# (there is generally no need to touch this)
as_service_key_value=Options
22) Save & close the file.
23) Open the file tomcat6.xml in Notepad. It can be located in "C:Program FilesBusiness Objectsdeployment" folder.
24) Make sure that the file has the correct path to the Tomcat6.0.x executable. This path is the one where Apache Tomcat was installed.
<exec dir="${as_dir}/bin" executable="${as_dir}/bin/Tomcat6.0.36.exe" failonerror="false">
25) Assign the right value to the respective variable in case it does not have it.
26) Save & close the file.
27) In the “C:Program FilesApache Software FoundationTomcat 6.0conf” directory create a folder called Catalina. Within the Catalina folder create another folder called localhost
“C:Program FilesApache Software FoundationTomcat 6.0confCatalinalocalhost”
28) Open Command Prompt (Always as Administrator) by clicking Start, Run, type "cmd" and click OK.
29) Change the deployment directory within the SAP BusinessObjects installation path you installed to ("C:Program FilesBusiness Objectsdeployment").
30) Run the command "wdeploy tomcat6 deployall".
31) A BUILD SUCCESSFUL message will appear once deployment of all WAR files is successful. If not, you need to review the failures and correct as needed.
32) Apache Tomcat 6.0.x is now deployed to and configured for usage with SAP BusinessObjects Enterprise XI 3.1 SP3.
33) You can now use the Windows Services management tool or the Tomcat Configuration tool to set Tomcat to automatically start on system boot if you wish.
With this easy guide for the upgrade you should be all set for your installation. We hope that this helps you make a fast transition for your applications by closing the security risk.
If you have any questions or anything to add to help improve this post, please feel free to leave your comments.
Are you satisfied with the way you currently manage the dependencies in your ETL? Dependencies between jobs (or parts of jobs) are an important aspect of the ETL management. It pertains to questions like: Do you want to execute job B if job A failed? Imagine that you have a job C with sub-job 1 (usual runtime: 3 hours) and sub-job 2 (usual runtime: 2 minutes). If sub-job 1 was successful and sub-job 2 failed, can you gracefully restart job C without the sub-job 1 being restarted again?
As soon as you have more than 1 simple job, you have to manage your dependencies. In this article (part 1 of a series of articles about ETL Dependencies Management) I’ll first list some of the characteristics I’m looking for in an ideal dependency management system. I will then have a look at some of the possibilities offered by SAP Data Services 4. In part 2 (my next post), I will propose the architecture of a possible dependency management system. In part 3, I will go into the details of the implementation in Data Services. I’ll finish with part 4 by telling you about how the implementation went, and if some improvements are possible.
The ideal dependency management system
In this post I will use the word “process” to design a series of ETL operations that have a meaning together. Example: extract a source table, create a dimension, or update a fact table. The objective here is to manage the dependencies between the processes: updating a fact table should probably only be allowed if updating the corresponding dimensions was successful.
A dependency management system should ideally have at least the following characteristics:
The possibilities
Let’s enumerate some of the possibilities offered by Data Services, with their respective pros and cons.
1) One job with all processes inside. This is very easy to implement, dynamic in terms of run times, but it doesn’t allow for concurrent runs. Most importantly, it means that failures have to be managed so that the failure of one process does not stop the whole job.
2) One process per job, with jobs scheduled at specific times. This is very easy to implement, allows concurrent runs, but is not dynamic enough. If the process durations increase with the months/years, jobs may overlap.
3) One main job calling other jobs (for example with execution commands or Web Services).
4) One process per job, all the jobs being scheduled at specific times, but checking in a control table if the pre-requisites ran fine. Otherwise they just sleep for some time before checking again.
5) Use the BOE Scheduler to manage jobs based on events (how-to is well described on the SCN). I’ve not tested it yet, but I like this approach.
By default, the first two possibilities only manage the “flow” side of the dependency management (after A, do B). But they do not manage the conditional side of the dependency management (do B only if A was successful). In both cases, a control table updated by SQL scripts would allow the ETL to check if the prerequisite processes have been run correctly.
What I don’t really like in the solutions 2 to 5 is the fact that it’s difficult to have an overview of what’s going on. You cannot really navigate within the whole ETL easily. The solution 1 gives you this overview, but at the cost of having a potentially huge job (without the possibility of processes running concurrently).
Also note that the solutions with multiple jobs will need to manage the initialization of the global variables.
What I miss in all these solutions is an optimal re-start of the ETL. If 10 of my 50 processes failed, and I want to restart these 10 only, do I really have to start them manually?
In my next blog post I’ll propose an architecture that addresses this optimal restart.
Until then, please let me know your thoughts about how you manage your ETL dependencies. Any of the 5 solutions mentioned before? A mix? Something else? And how well does it work for you.
If you have a Java application that returns a table and you are planning to use this as a source of information for SAP Data Services, the best way is to return a table with the same data type as the Data Services Template table “AWTableMetadata”. I will explain how to easily do that in this article.
First you need to go to the libraries folder inside your SAP BusinessObjects installation (…SAP BusinessObjectsData Serviceslib). From this folder we have to import the following libraries to our Eclipse Java project.
The easiest way is to put these libraries inside your Java ext libraries folder so your application will import it automatically. Also if you’re planning to deploy this application on a server you need to place this library inside the server library folder too.
Import these libraries inside the project:
Import com.acta.metadata.AWAttribute;
Import com.acta.metadata.AWColumn;
Import com.acta.metadata.AWTableMetadata;
Once we have our libraries imported inside our Java project we have to assign the return value for the function in charge of constructing the table as the same data type for the table.
Public static AWTableMetadata createAWTable () throws Exception {…]
Then we are ready to construct our table. To do so we have to:
Finally we have to make the return statement as “return awTable”.
In conclusion, once we have our function done we will be able to communicate and exchange data with data services through our application in this case with a table and be able to use our application as a Data Source.
If you have any doubts or suggestions, please leave a comment below.
You have finished you standard implementation of SAP Rapid Marts XI, everything went fine but your customer start to have issues regarding the time consumption of the delta loads. In this article I will explain a couple of approaches to achieve a better performance on delta loads of SAP Rapid Marts. In the image below we have the typical infrastructure of SAP Rapid Marts, loading into on single data warehouse.

This infrastructure has pros and cons but I will highlight two main advantages:
1st Approach: One job runs it all
Taking the architecture illustrated above as our basis, the first step to achieve better performance will be to create one single ETL job to run the different SAP Rapid Marts involved in our implementation.
This task is simple; just create one workflow per SAP Rapid Mart containing all the different workflows that are part of each SAP Rapid Mart. Once this task is done, create an ETL job with all the corresponding global variables, drag and drop all the workflows and connect them to create a sequence of execution.
This job also allows us to take advantage of the “execute only once” option in SAP Data Services. This option is set for all the components in SAP Rapid Marts and it defines that each component within the same ETL job execution is executed only once. If you take into account how many components are shared between different SAP Rapid Marts this approach becomes very interesting.
In addition, this approach allows us to create a strategy of try/catch in the ETL process. Some customer environments can have intermittent issues that can crash the execution of our daily loads (i.e. network errors). We will place try and catch statements for every workflow of the job, then inside the catch statement we will place again the workflow that we were trying to execute, the following image illustrates the idea:

The try/catch + ”Execute only once” strategy allows you to retry the execution of a component of the ETL job and continue the execution where it stopped.

Once this idea is implemented the execution of your SAP Rapid Marts will be more robust and optimized but maybe not enough to fulfill your customer´s expectations… so let us move on to the second step.
2nd Approach: Working around a parallel execution
Analyzing the information of the Performance Reports generated in SAP Data Services Management Console after the execution of a job, you will be able to identify the components with the worst execution times.
These components can vary from one implementation to another depending of your customer´s environment; within the top 10 worst execution times you will find some components generating information of dimensions and/or fact tables of the model. Some of these components can be easily removed from your sequential execution and placed on a separated job to be executed in parallel.

It is critical at this stage to ensure that these components are completely removed from the sequential execution and that any final output of the component is not used in other parts of the ETL process (i.e. subsequent table lookups). To ensure this, the function “Where is used” of the SAP Data Services Designer will be extremely helpful.
In my experience, after applying these two steps we should experience a considerable improvement on execution performance of delta loads. To give you an example, in one of our recent implementations we started with an execution time of 17 hours for five SAP Rapid Marts running sequentially, this was decreased to 6 hours using the two approaches I have described in this post.
Digging deeper
If even after applying the previous steps you still face bad performance in isolated components, this situation will require more analysis and customization at lower level.
Some components of the standard SAP Rapid Mart tries to execute on the ERP side some components with complex logic, which can take a very long time (i.e. SAP General Ledger RM + SAP Note 1557975 or SAP Inventory RM + SAP Note 1528553)
In these cases, the workaround is to split the process in several steps and maybe make use of custom tables on the ERP side and performance boost will be remarkable. I can tell you that in our most recent implementation one of the components was taking no less than 12 hours to run but after we analyzed and modified the behavior of the component, to make use of one custom table on the ERP, this component took no more than 30 minutes to run. This process of customization of a component took 2 man days to be completely implemented.
As conclusion, my experience with the SAP Rapid Marts is very positive. SAP provides a rapid deployment solution that can be up and running end-to-end in a few weeks. Furthermore, it provides an extremely easy to use framework to ensure your customer has the ability to develop any level of customization in a few weeks. Overall we are in front of a solution that will allow your customers to create their own data warehouse in weeks instead of months. If we can improve this issue of delta load performance, the solution becomes even more appealing to your customers and it helps to increase satisfaction levels with the tool.
That´s all folks! I hope this article will help you to raise the bar in your SAP Rapid Marts implementations. If you have any doubts feel free to leave a comment below.
I have faced a problem recently and I wanted to share the resolution, in case you have to deal with the same topic. I was trying to upgrade a Data Services machine following SAP procedure (this is copying the configuration files uninstall and then install the new version – not very sophisticated as you can see). This wasn´t as simple as I first though.
Problem started after uninstalling the software, the new version refused to install stating that I should first uninstall the previous version. I uninstalled the software again… but Data Services is still there, so uninstalled again, but this time the process failed (makes sense as the software is already uninstalled), so I kept trying… reboot…uninstall… reboot…rename older path name… reboot…you see where this is going…
So, how did I finally solve this?
Now you can launch the installer and this time it should work.
Hope this may help you if in case you are experiencing the same issue. Leave comments below if you have any doubts or if you would like to add anything.
Ever wanted to find out how big are the tables in your data warehouse or in your ETL storage area? Here is a quick tip.
You can get the size of each table belonging to a specific user with the following code:
In order to get the size of the indexes with the corresponding table names (useful when the indexes have system-generated names), we need another query: