SAP Explorer has become one of the most useful tools in the Business Objects Toolkit, although sometimes we do not appreciate all its potential. If our data set has one or more geographical dimensions, like city, country, state.., we should use the geographical variable types for these dimensions. This kind of dimensions allow us to introduce map analytics in our Exploration Views, which is a plus. Below we will proceed to explain the needed steps in order to set up these dimensions and explain how to better use them. First of all, we need to log on SAP Explorer with an account with permission to "Manage Spaces".
After this step, we should go to "Manage Spaces" and, either select the existing Exploration View that we want to modify with geographical data, or we create a new one.

dimension geo1
dimension geo2
dimension geo3
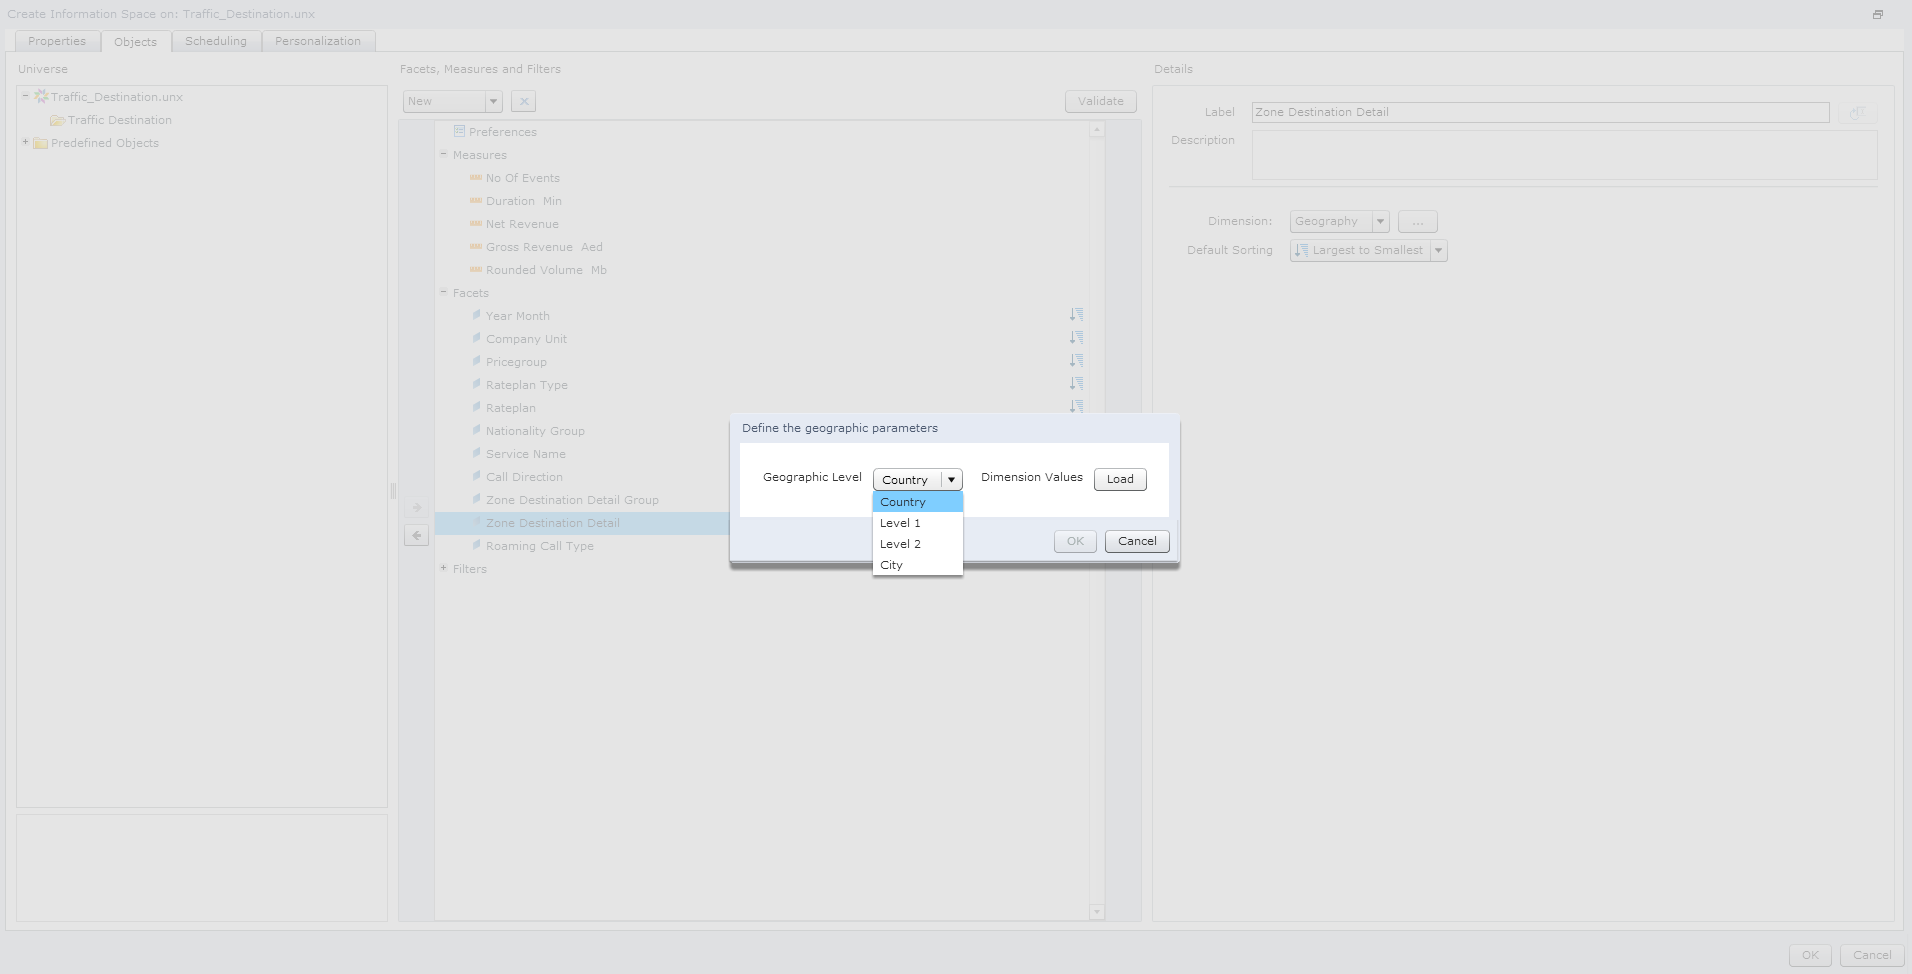
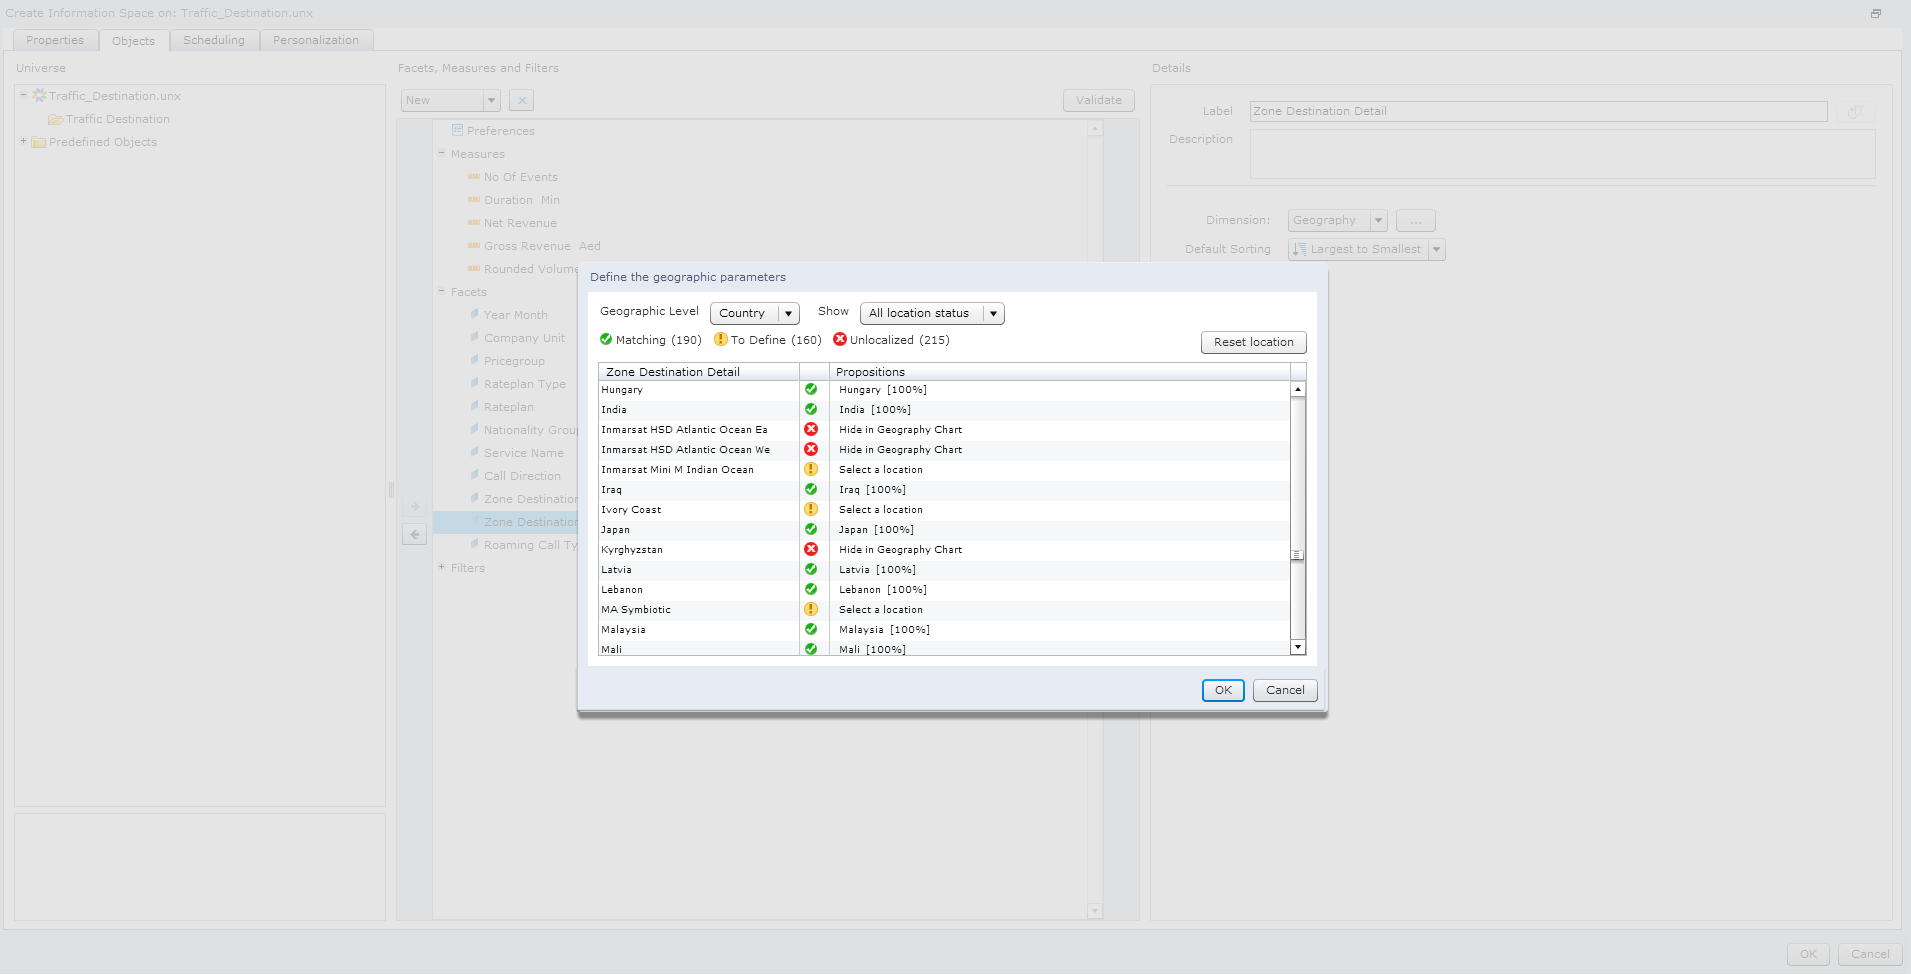
Then we should go to the "Objects" tab. There, we will put all the dimensions and measures that we want to show in the Exploration View. We will select the geographical dimension, "Zone Destination Detail" in the example, and change the "Dimension" field to "Geography". After this, we should click on the "..." field and choose the type of "Geographical Level" this dimension has. We can select "Country", "Level 1", "Level 2" and "City". Level 1 and 2 are for regions, states, etc. With the "Geographical Level" selected, we need to click on the "Load" button. At this point, the application tries to match the dimension values with a geographical place on the selected level. After few seconds, the below image will appear: Here we will see the following values:
-"Matching": when the values are found
"To Define": when the application finds something but requests for a check up or there are several similar values and it asks for a confirmation
- "Unlocalized": when the values are not found
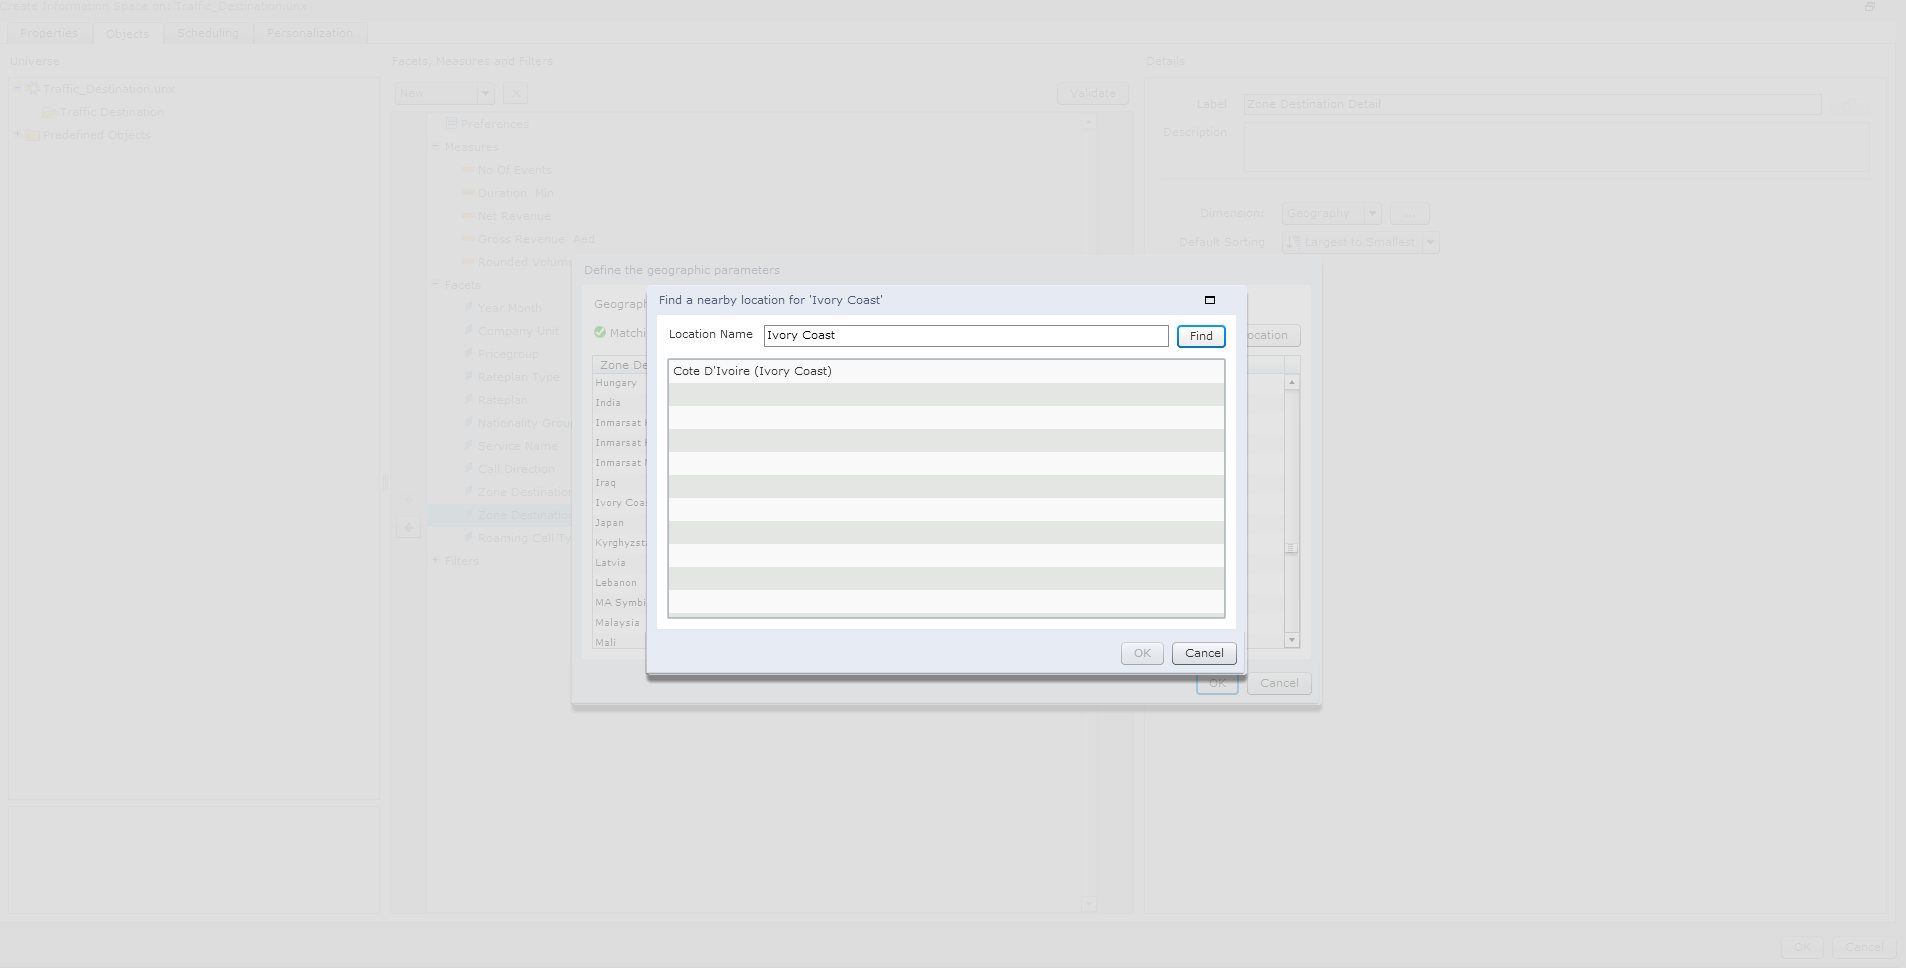
We could "Index" the Exploration Spaces with "To Define" and "Unlocalized" values but they will not appear in the map. At this point, we need to do a manual search and check one by one the not matching values, clicking on "Propositions". We will be able to select one of these options given by the application, hide it with "Hide In Geography Chart" or try to find a place close to the value.
dimension geo4
When we finish selecting all the values that we want to show and the Exploration View is ready, we will proceed to index it.
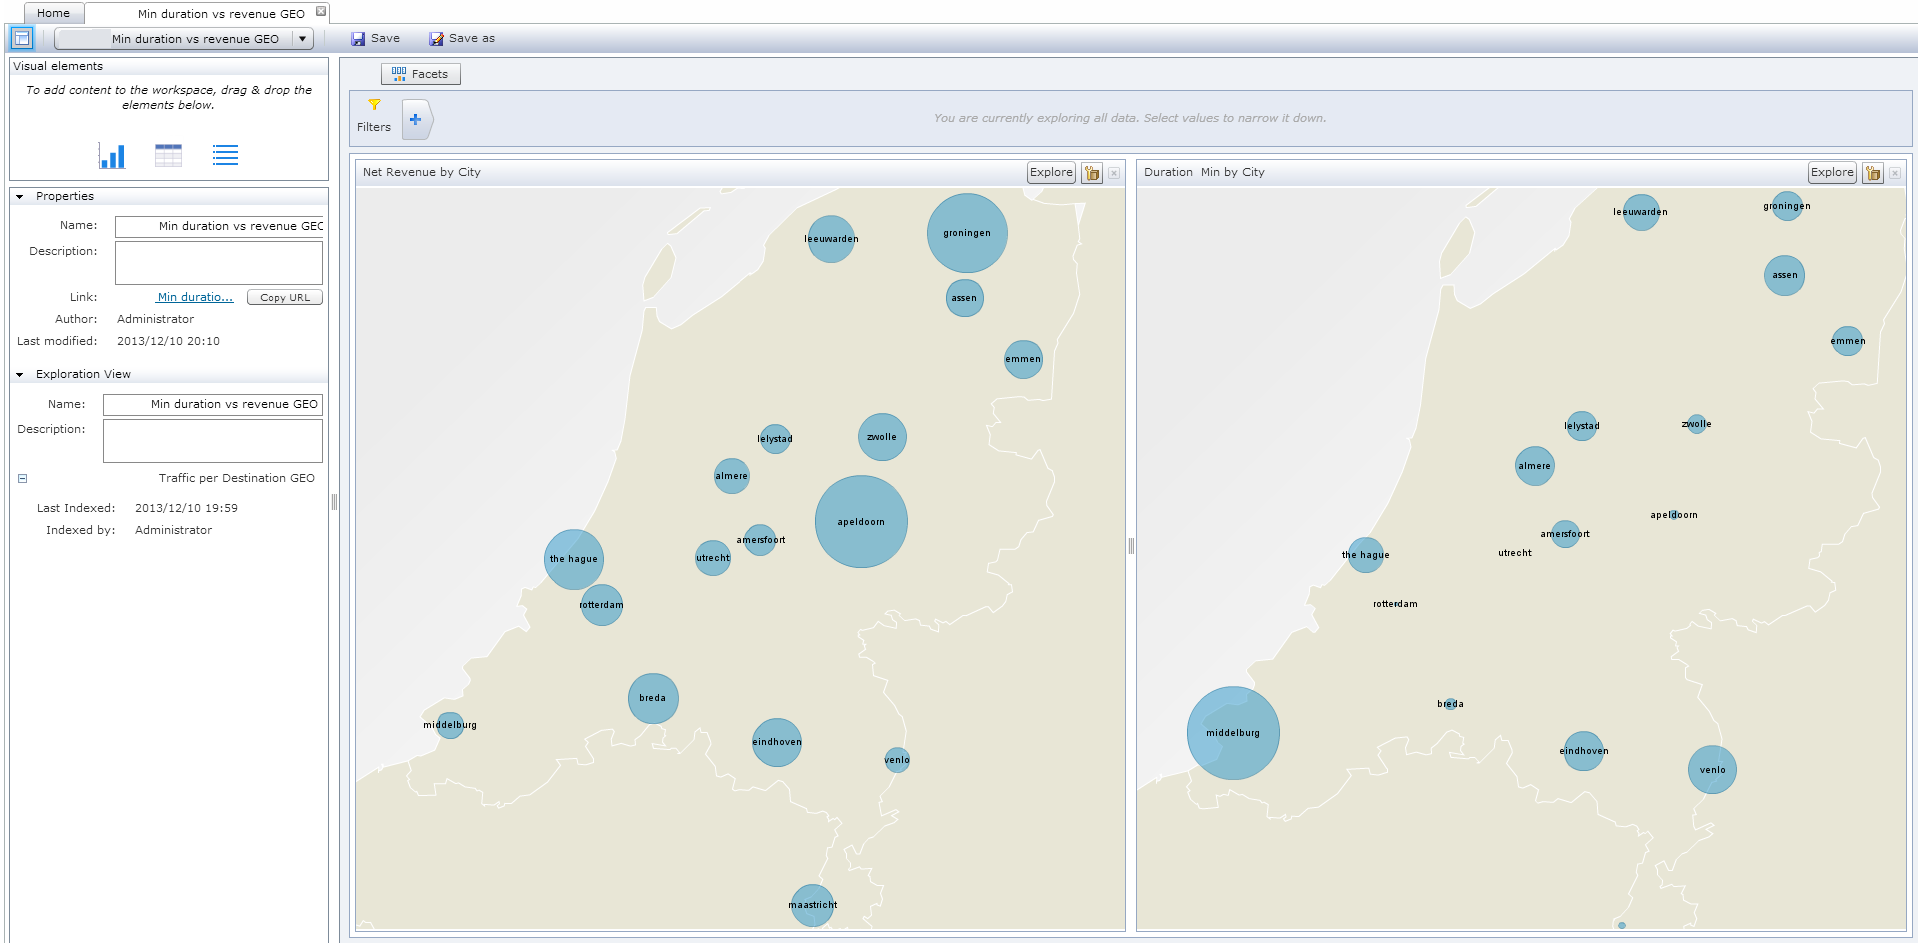
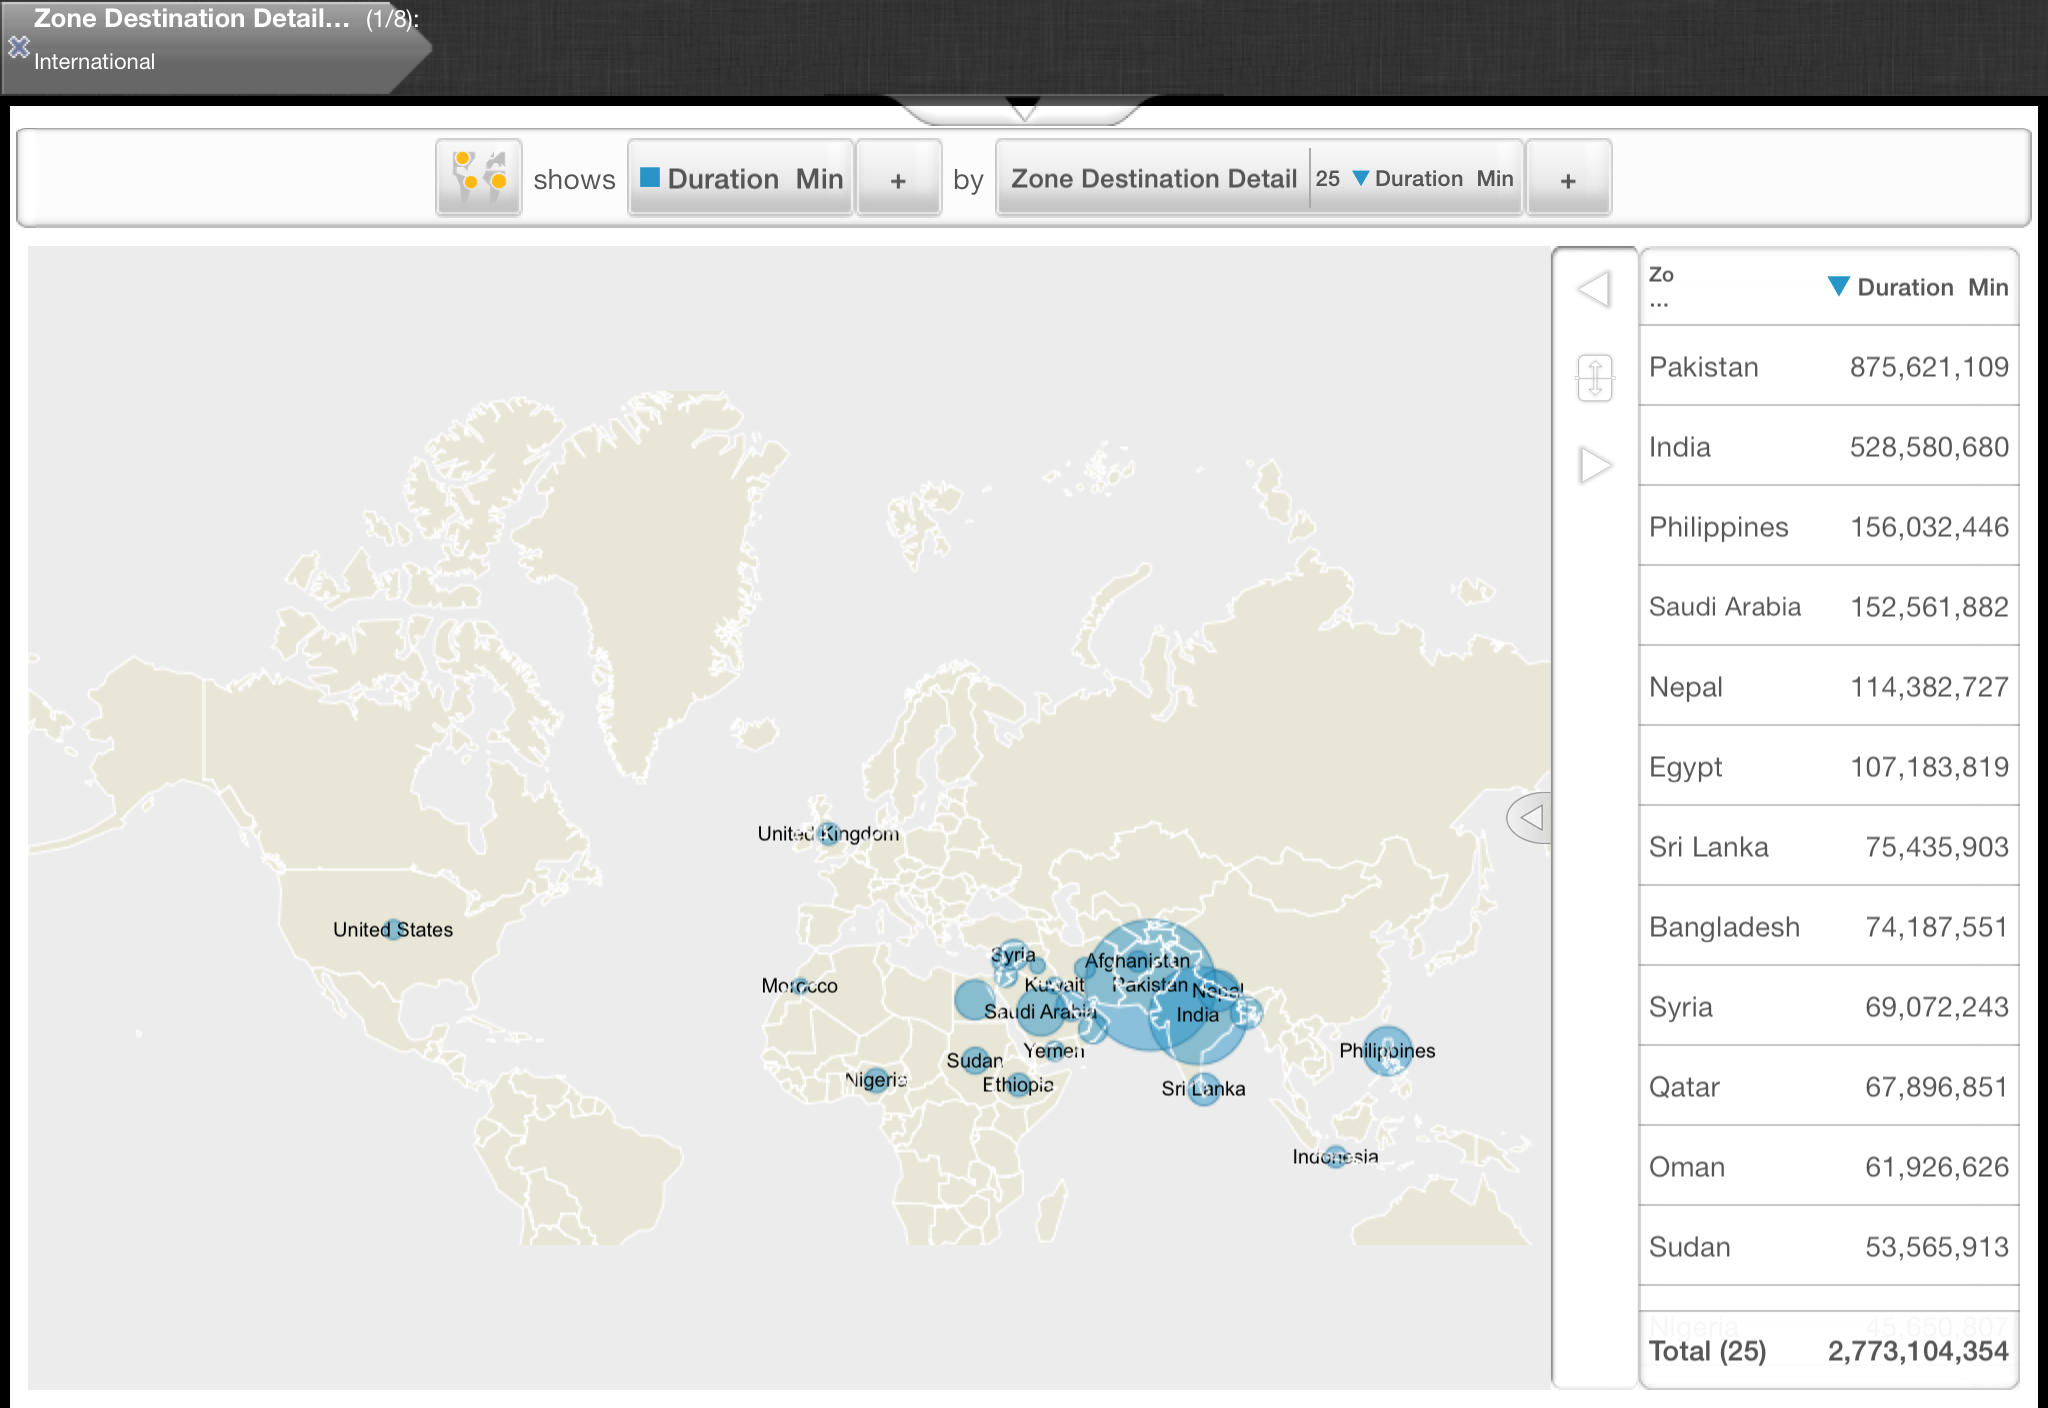
Finally, we will be able to see the results of using this kind of geographical data. For that, we will open the Exploration View and select the Dimension for "displaying". Then the "Geography" option will be available, we just need to click it and see the results.

dimension geo5
We will also be able to create "Information Spaces" of these Dimensions:
dimension geo6
Moreover, this tool allows us to see all this information on the Mobile Application.

dimension geo7
dimension geo71

dimension geo8
As a conclusion, using this kind of dimensions slightly improves the possibilities of our Exploration Views and their analysis.
We hope this post helps you when you start using Geographical Data in your Exploration Views.
If you have any questions or comments, do not hesitate to add a comment below.